Deprecated
Previous guides
This page collects older install and integration methods. Do not use them for new integrations. Use it to check sites already integrated this way. For the current method, see Web Player SDK Integration Guide.
Shopify — Code directly in the theme
Do not use this method for new stores. Install with the ShopliveAssistant app in Appendix G · Shopify. This section is for stores that put code in the theme the old way.
Put the code in the theme and a page
Do this after Appendix G · Shopify Part 1 (install the app · product sync).
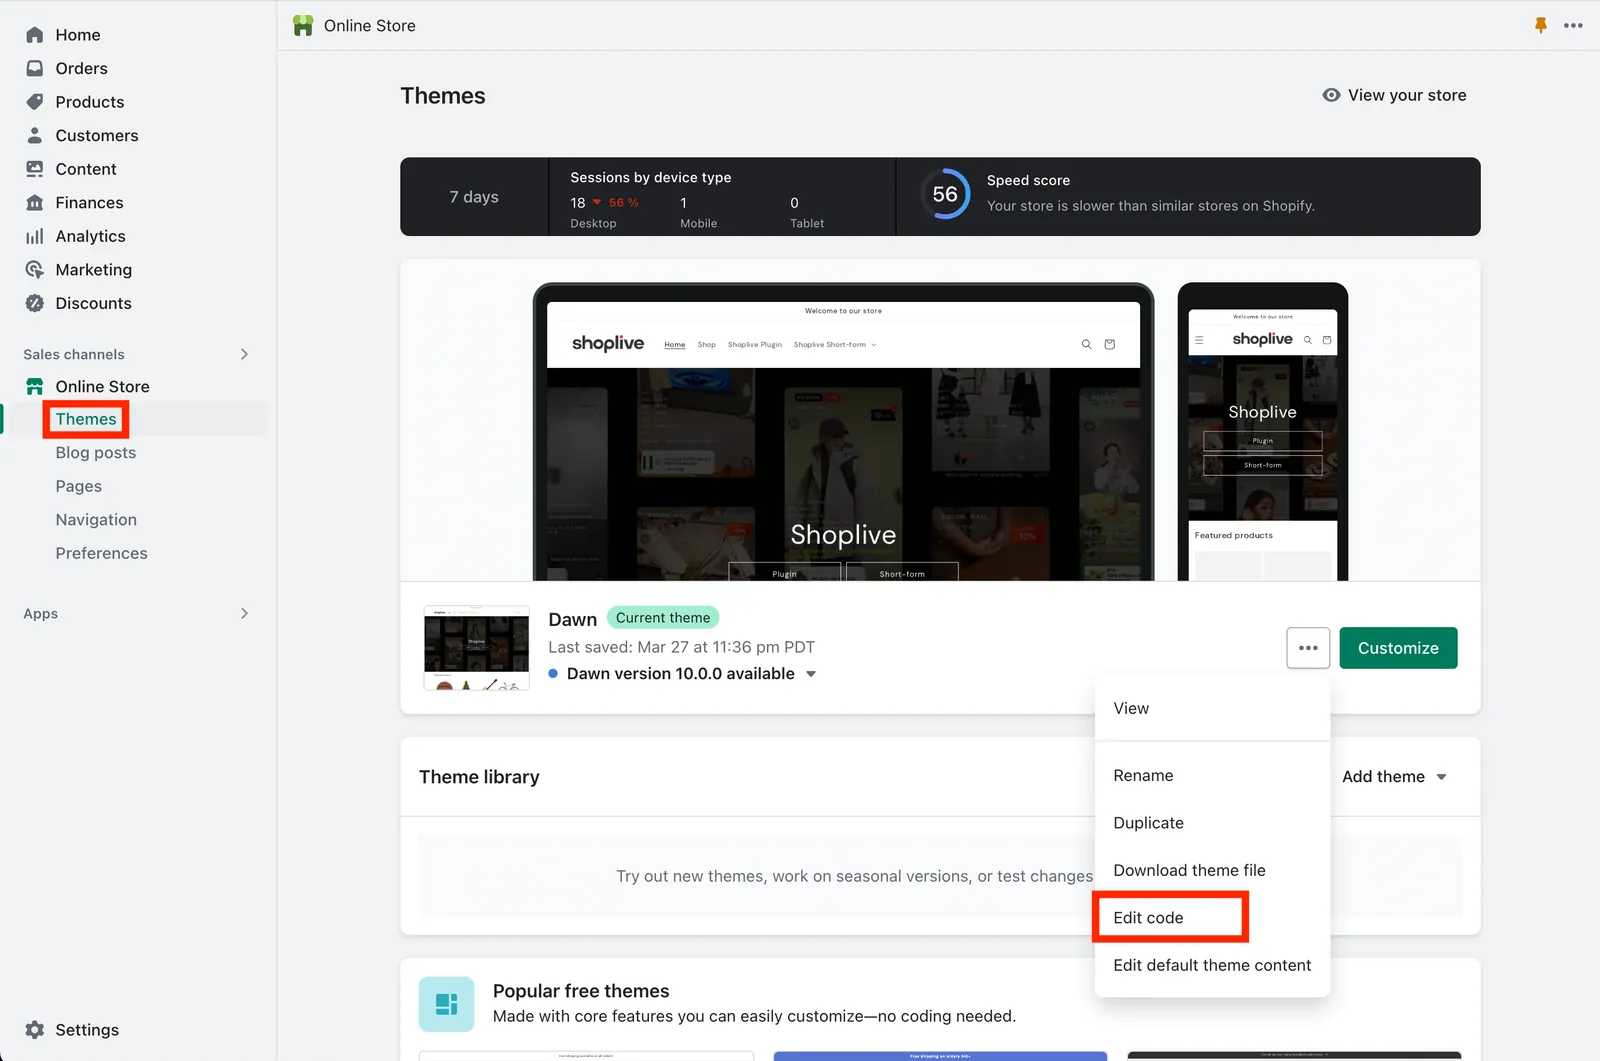
- Open the theme code editor. In Shopify admin, Online Store › Themes, then Actions (…) › Edit code on the current theme.
- Paste code ①. Open
theme.liquidin the file list on the left and paste the code below on the line right after the line starting with<body. ReplaceYOUR_ACCESS_KEYand Save.<!-- Shoplive start --> <script src="https://static.shoplive.cloud/shoplive.js"></script> <script> cloud.shoplive.initPlugin({ accessKey: 'YOUR_ACCESS_KEY', platform: 'SHOPIFY' }); // ← the only thing to change: your Access Key {% if customer %} cloud.shoplive.setUserObject({ userId: "{{ customer.id }}", userName: "{{ customer.first_name }}" }); {% endif %} </script> <!-- Shoplive end -->Shopify fills the
{% if customer %}part with the signed-in customer's number and name. Withplatform: 'SHOPIFY', the SDK also handles add-to-cart inside the player (Appendix A · Add to cart).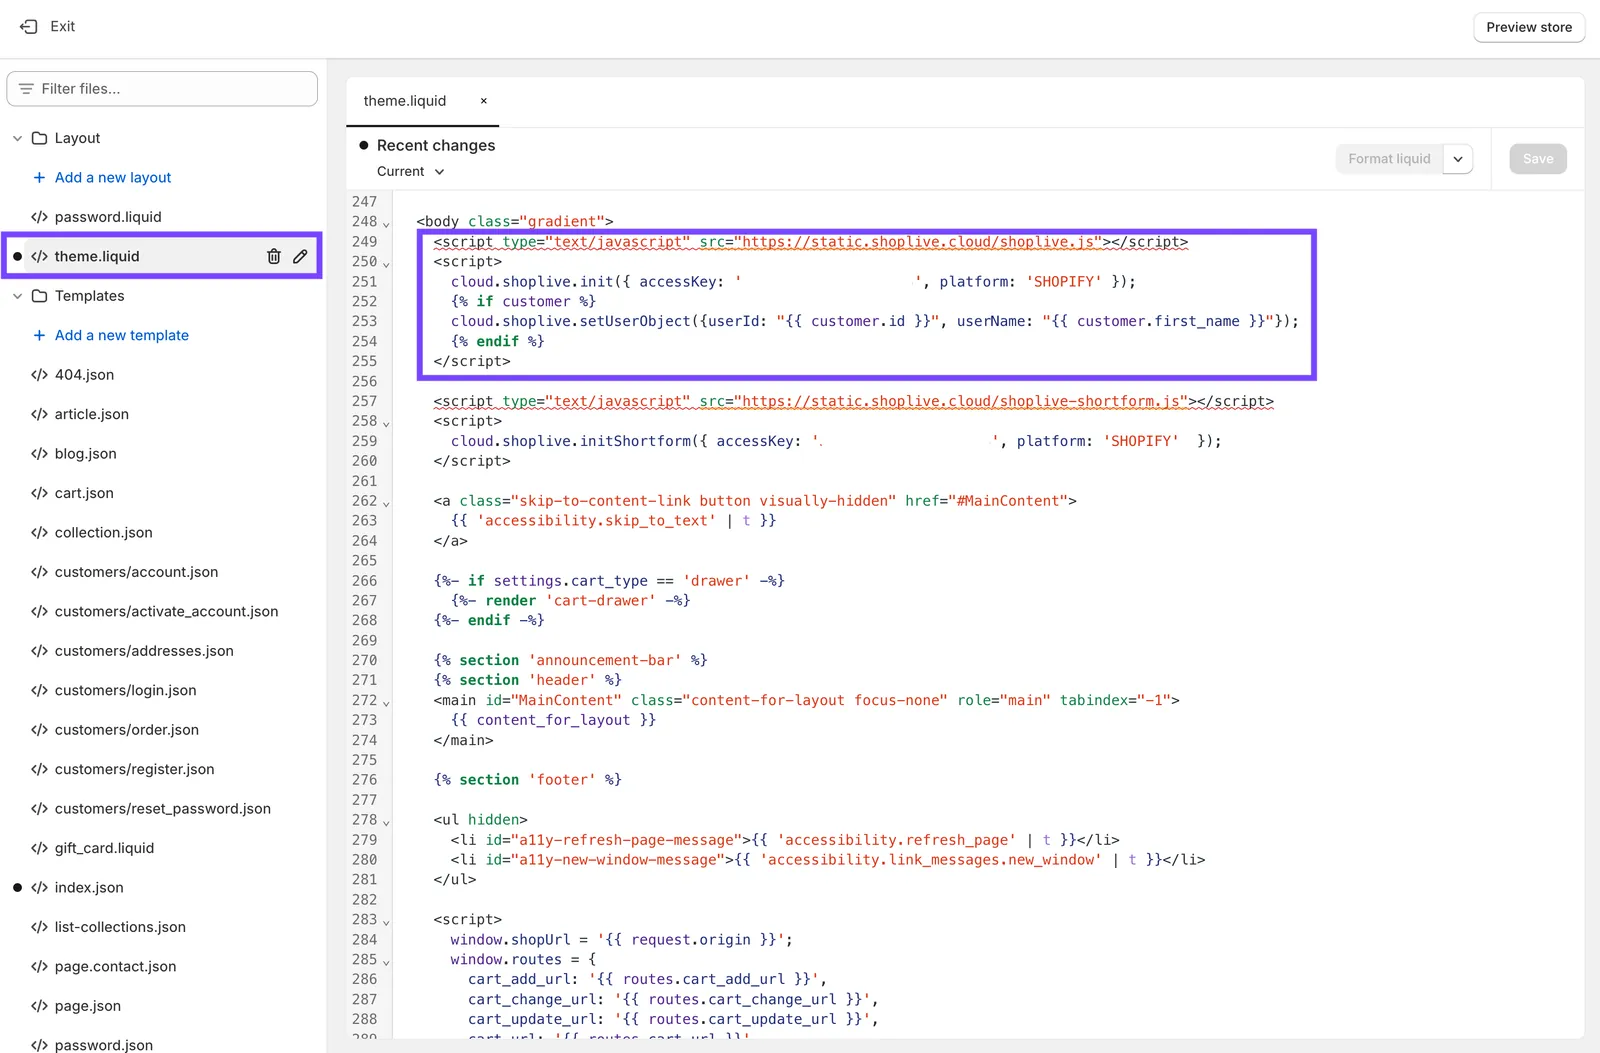
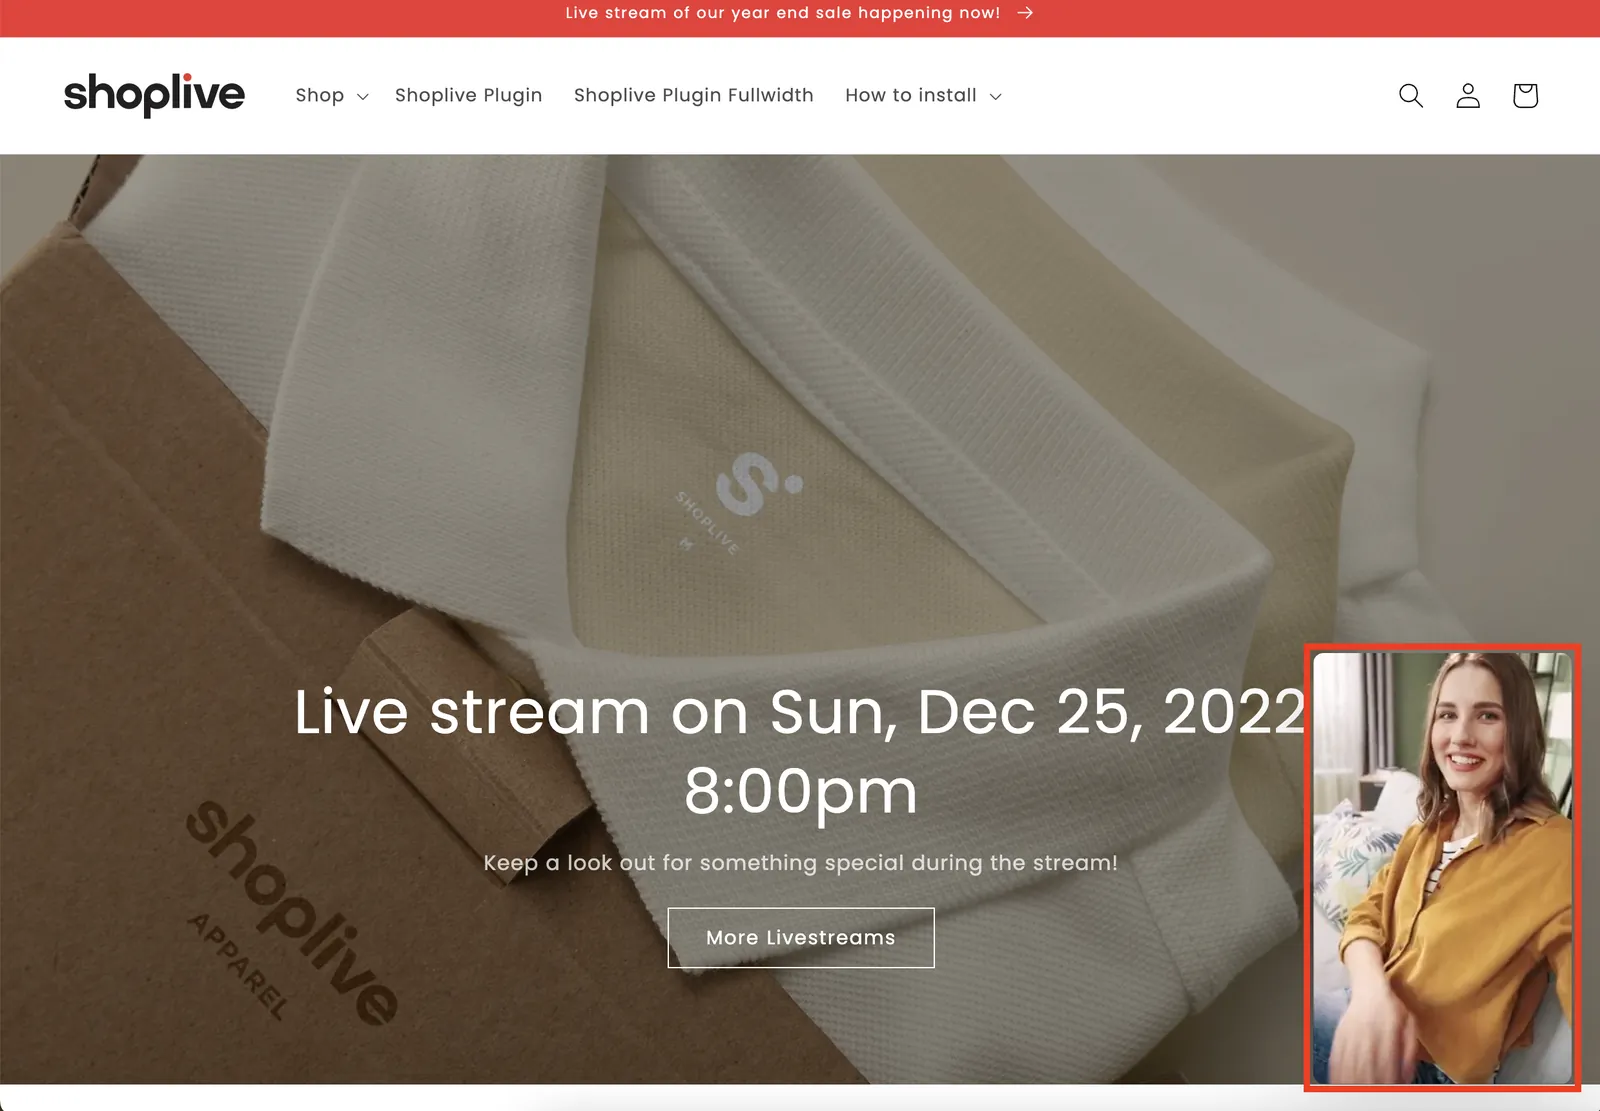
theme.liquidin the file list on the left · the purple box is where code ① goes. (The capture shows the old namecloud.shoplive.init; paste the code above as is.) - Check the mini preview. Open the store preview. If a broadcast is live, the mini preview shows in a corner. If not, check the API · Plugin switch in item 3 above.
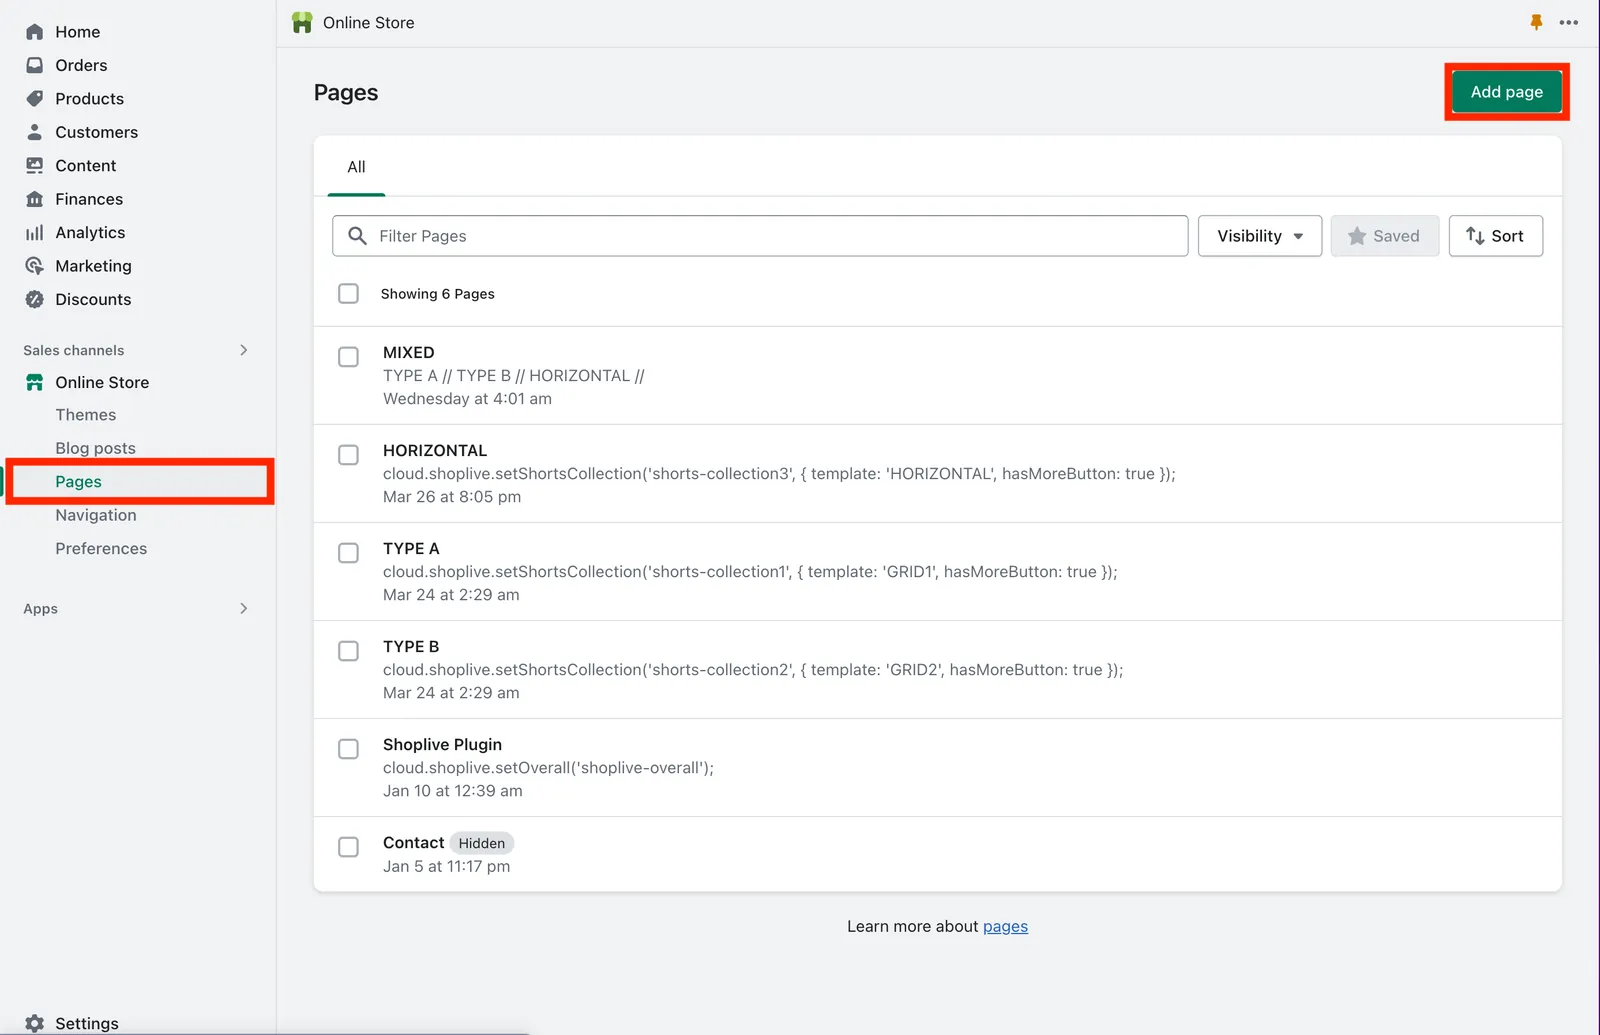
- Make the live list page. Online Store › Pages › Add page, and enter a title (for example LIVE).
- Paste code ②. Click the </> (show HTML) button at the top right of the content editor and put the code below in. Set visibility to Visible and Save.
<div id="shoplive-overall"></div>
<script defer>
  document.addEventListener('DOMContentLoaded', function () {
    cloud.shoplive.setOverall('shoplive-overall');
  });
</script>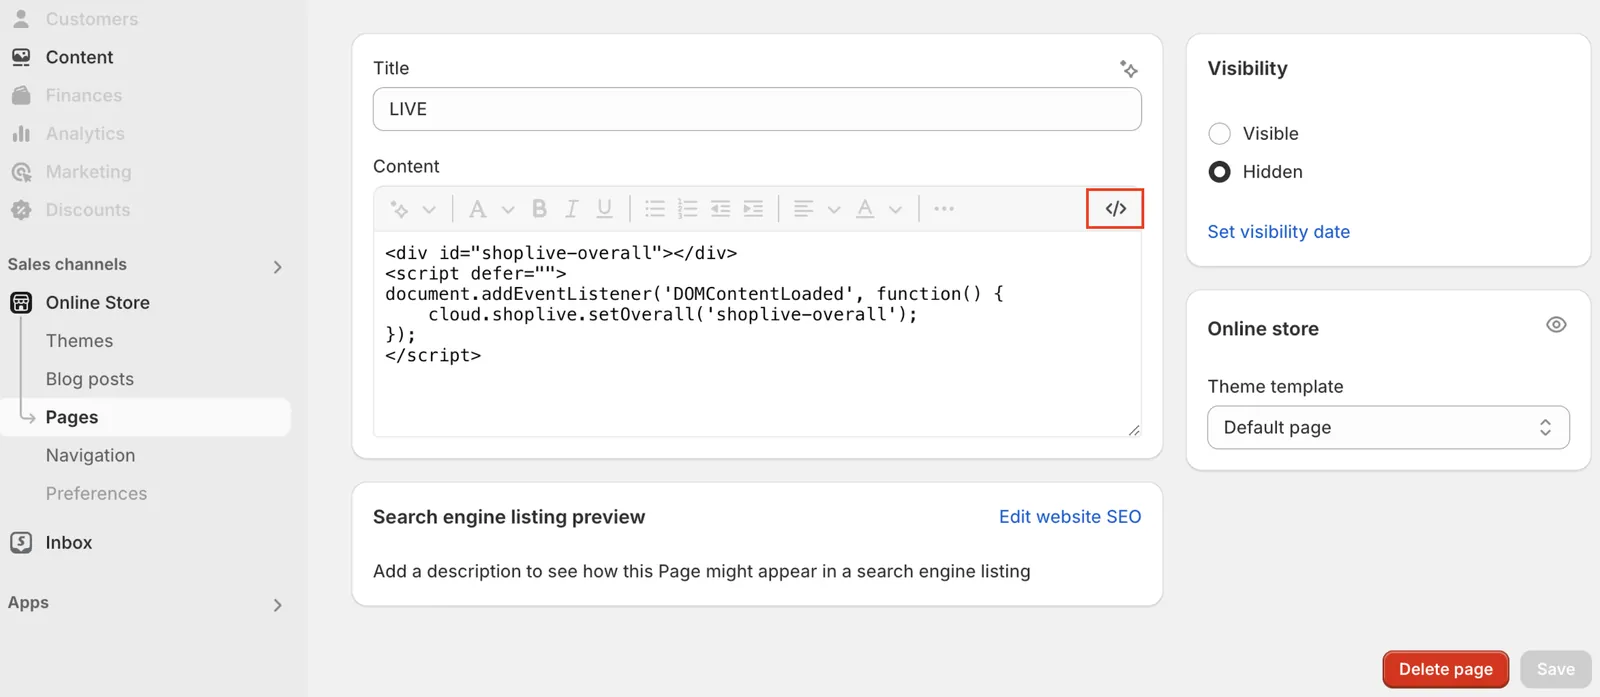
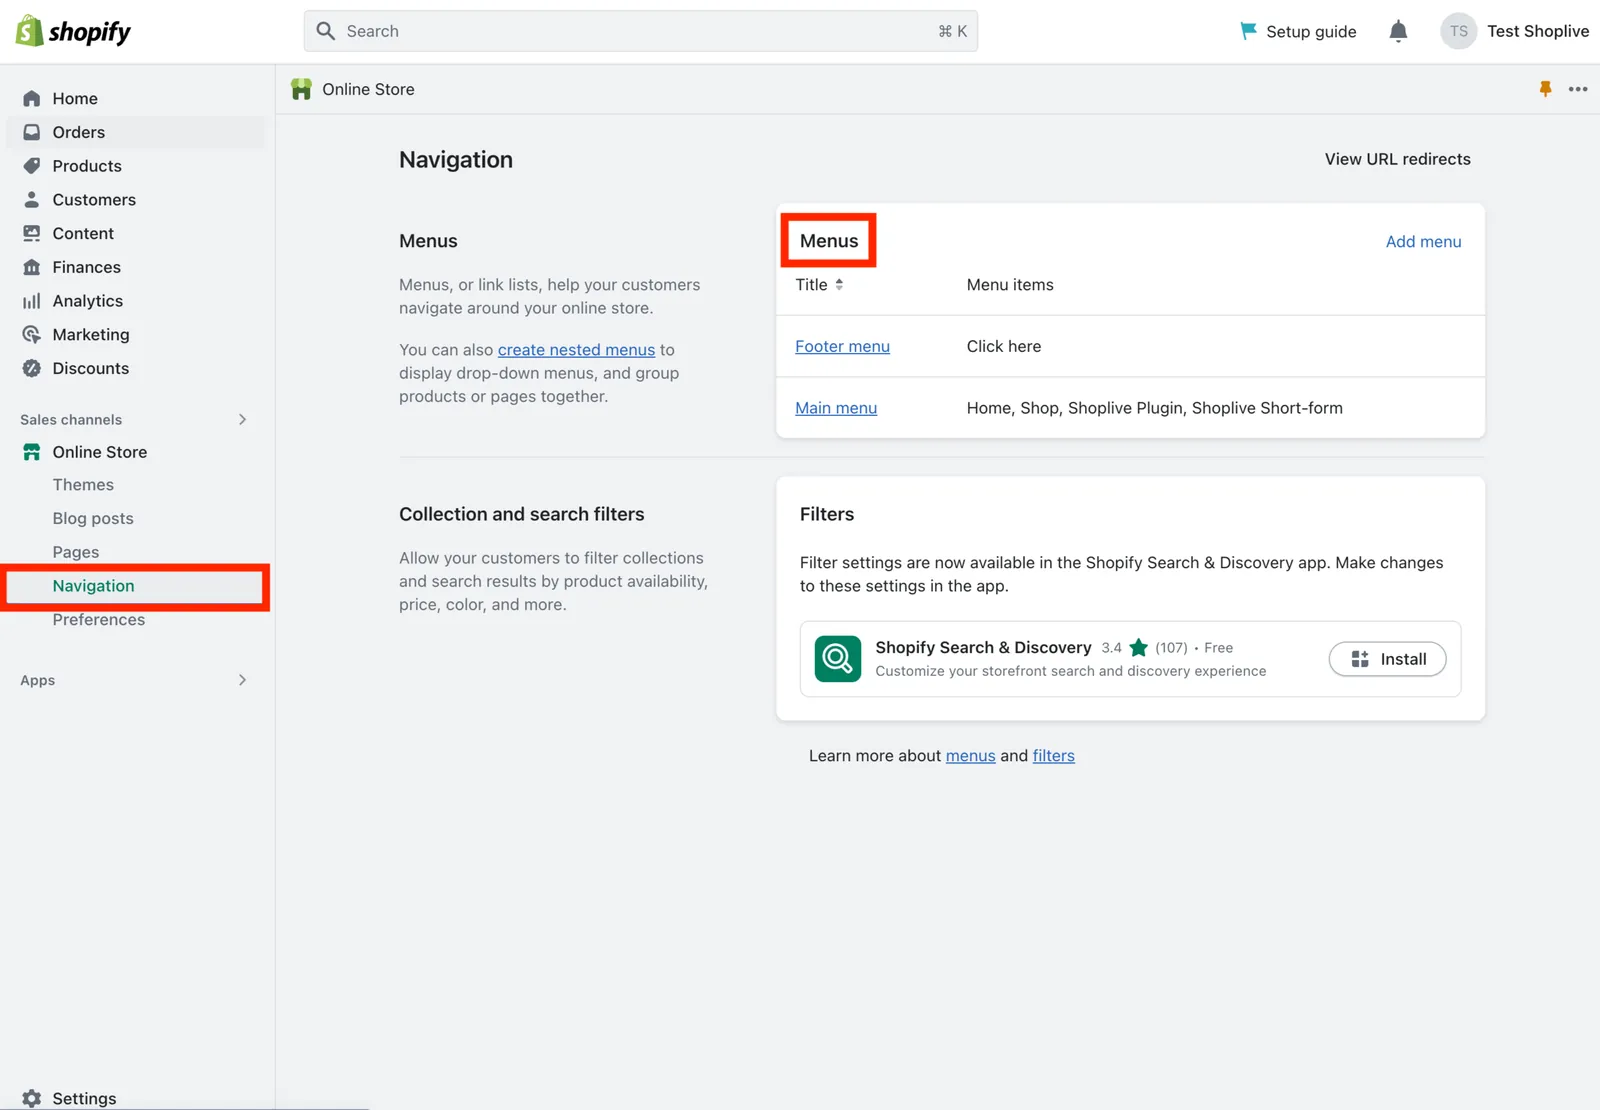
- Link it from a menu. In Online Store › Navigation, open a menu (for example Main menu), use Add menu item to add the page you just made, and save.
Purchase conversion — custom pixel
You cannot place a script on the checkout-complete screen directly, so register it under Settings › Customer events › Custom pixels and call it on checkout_completed. We recommend adding this code together with a developer.
const script = document.createElement('script');
script.src = 'https://static.shoplive.cloud/shoplive.js';
script.async = true;
document.head.appendChild(script);

script.onload = function () {
  cloud.shoplive.initPlugin({ accessKey: 'YOUR_ACCESS_KEY' });

  analytics.subscribe('checkout_completed', function (event) {
    const checkout = event.data.checkout;

    // for a member order, derive userId the same way you did while watching
    const customerId = checkout.order.customer && checkout.order.customer.id;
    if (customerId) {
      cloud.shoplive.setUserObject({ userId: String(customerId) });
    }

    cloud.shoplive.sendConversionEvent({
      accessKey: 'YOUR_ACCESS_KEY',
      eventType: 'purchase',
      orderId: checkout.order.id,
      products: checkout.lineItems.map(function (item) {
        return {
          // Products imported through the Shopify integration carry the Shopify product ID as customerProductId
          customerProductId: String(item.variant.product.id),
          purchaseUnitPrice: parseFloat(item.variant.price.amount),
          purchaseQuantity: item.quantity,
          currency: item.variant.price.currencyCode
        };
      })
    });
  });
};
Check
- While a broadcast is live, the mini preview shows in a corner on any store page
- Clicking the LIVE menu shows the featured broadcast and the list
- Signed in, open a broadcast and look at chat — your customer name shows, and adding a product to cart goes into the Shopify cart